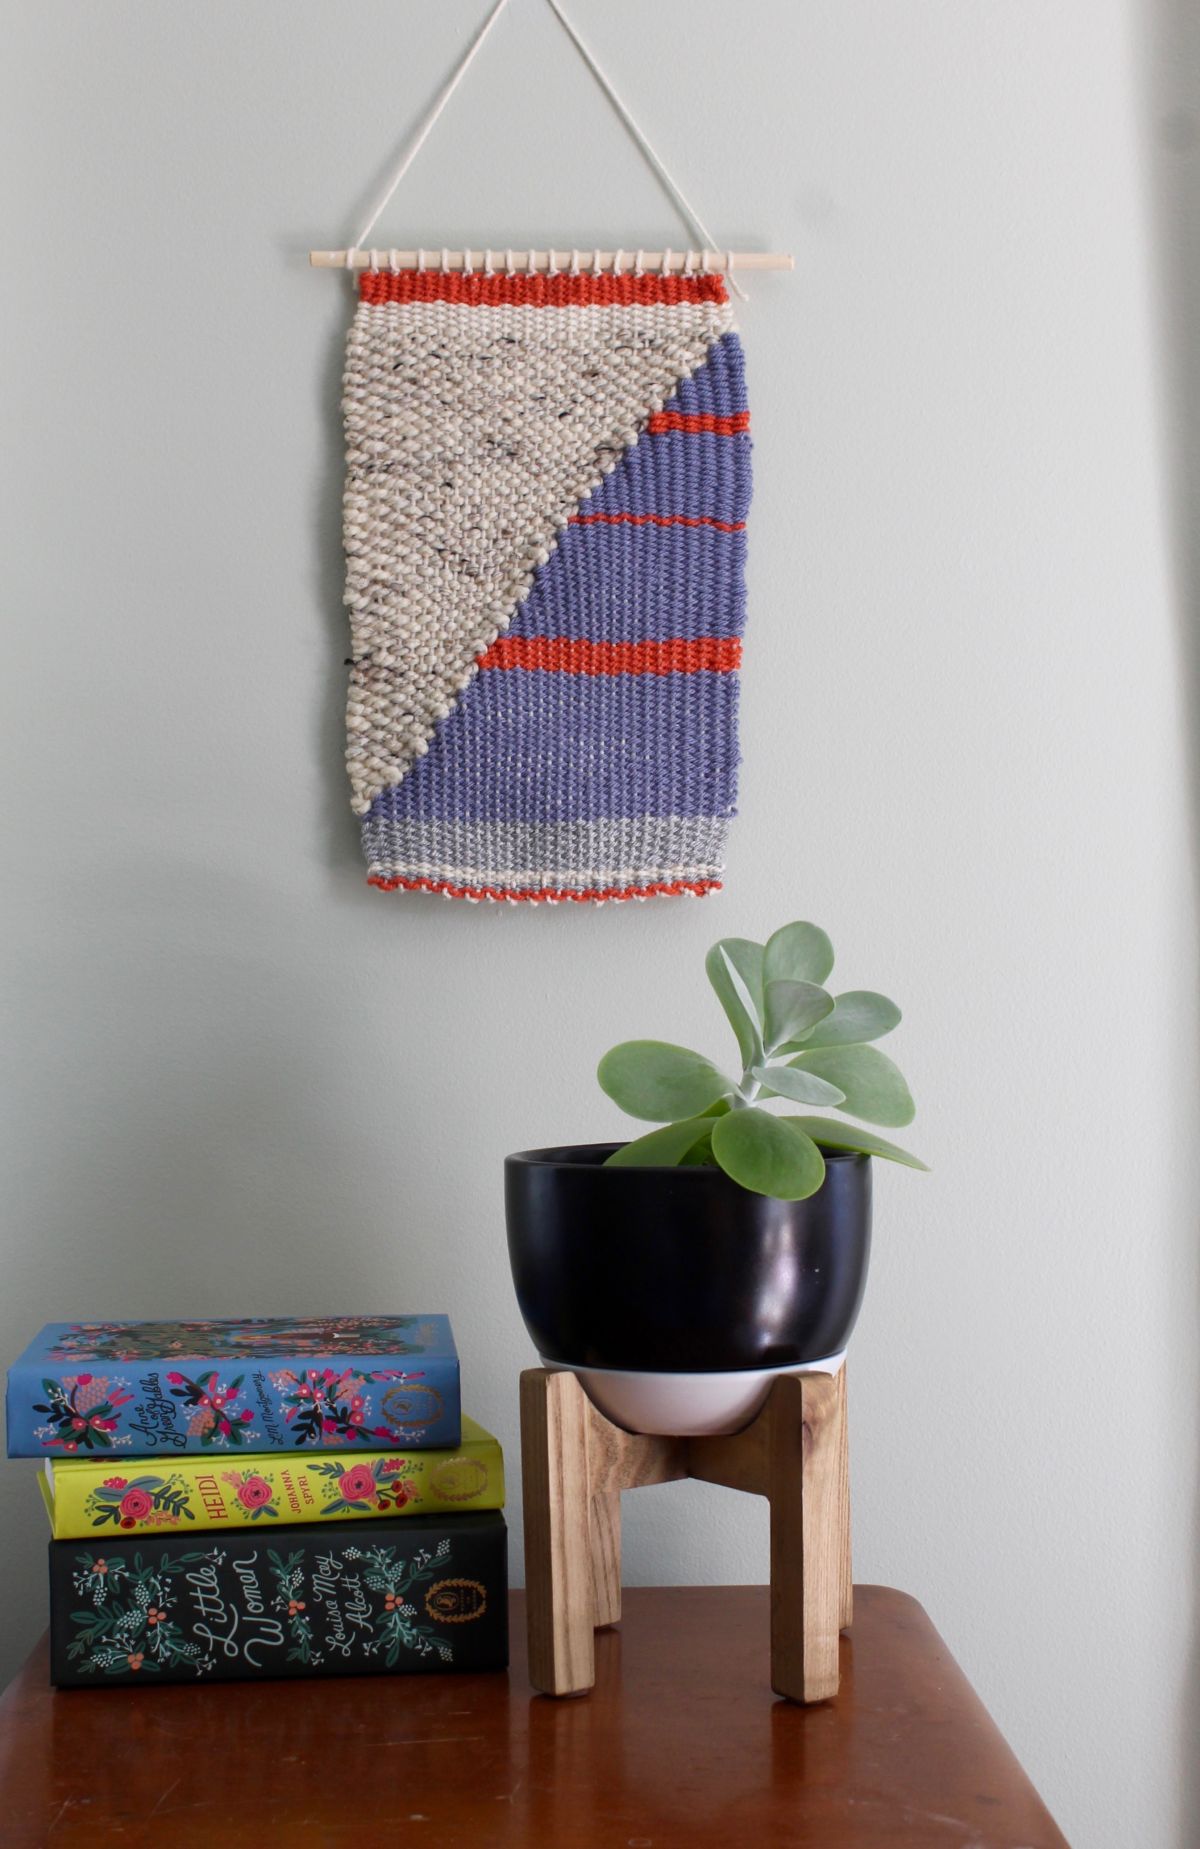
Weaving Loom - Basic Yarn DIY Wall Hanging
This simple weaving loom wall hanging is perfect to add together a fun flare to your gallery wall or as a statement slice to hang in your domicile. Y'all can easily customize the weaving past picking colors of yarn that suit your domicile.
 View in gallery
 Now you don't have to worry about scrounging effectually a shop for the perfect particular to add together to your walls; you can simply weave it yourself! What'south even more than perfect is y'all only need 2 supplies to make this lovely wall hanging: yarn and cardboard! As simple as that! We will show you how to make a handmade loom out of paper-thin so you lot can make as many weavings every bit your heart desires – but maybe don't display them all in one place!
 View in gallery
  View in gallery
 Materials you'll need to Weaving Loom:
- Yarn in various colors
- Paper-thin rectangle most 10in by 14in depending on the size you want your weave
- Wooden dowel
- Ruler or measuring tape
- Scissors
- Optional: needle
How to create the loom:
1.Outset by making your loom past cutting out a sturdy piece of cardboard to the size y'all want your loom to exist. For reference, our cardboard loom is almost 10in by 14in (however our actual weave is almost 8in by 14in).
2.Next make ¼ inch tick marks on the top and bottom of your loom (the shorter sides). You desire to make certain in that location is an even number of tick marks and that the tick marks roughly line up due south at the superlative or lesser of your cardboard loom. If ¼ inch seems besides small for you, option a different measure, just be sure to be consistent across the superlative and bottom.
three.In one case you have your tick marks in place, gently make a directly and small cut into each of them, again making sure you take an even number of cuts.
 View in gallery
 4.After you take cut into each of the tick marks, you lot can thread your loom with yarn. Take the end of some white or evidently colored yarn (note: this will evidence through slightly so we recommend a lite or white color yarn) and starting time by inserting it into the first tick mark slit on one finish at the height of the loom (information technology doesn't matter which stop you start on). You desire to brand sure that you insert information technology with almost half of the looms length of string dangling out the back so you can tie this off later.
5.Next accept the string and wrap it over the loom and into the slit parallel at the bottom the loom, so yous have a vertical line of yarn. Loop the yarn effectually the back of the weave and and then insert it into adjacent available slit from where you started and repeat this process until y'all have filled all your slits.
 View in gallery
 6.Finally, take the dangling tail of yarn on the back of your loom and tie this to the last cord that you inserted to create a diagonal line on the dorsum. This will keep all your strings tight and in identify.
 View in gallery
 How to create the weave:
1.Now that you have your loom gear up, information technology is time for the fun function: weaving! Cut off a generous corporeality of the first color of yarn you want to use. If you accept a needle,yous tin can thread the yarn into a needle to make the weaving procedure a trivial easier, but it is non necessary. Take your string and thread it over then under, over then under the warp threads on the loom in a straight line all the way beyond the loom. One time you get to the end, yous can simply repeat the pattern on the next row starting with the opposite of what you left off on: east.g. if you left off on going under you will start by going over for the next row. Y'all desire to make certain not to pull the string likewise tight on the edges or else your weave will be kickoff to pitch in on the sides, so keep the cord squeamish and loose on the edges.
 View in gallery
  View in gallery
 2.Continue weaving your loom using this process. Once you are done with a color, just cut off any excess cord, making certain to get out near 2in of extra string hanging off the end (you will clean this up at the end). Add together a new colour following the same directions. Information technology is fun to play around with different colors, textures, and sizes of yarn to create a more than dimensional weave. You can also play around with dissimilar shapes by not bringing the yarn all the way to the other side, similar nosotros did with the triangle.
 View in gallery
 Tying off the weave:
ane.Once you are finished with your weaving, and then it is time to cut information technology off. Take pair of scissors and cut across the white cord on the back of your loom.
 View in gallery
 2.Next, starting at the pinnacle or the bottom, gently pull the first two white strings out of the slits in the cardboard (these should be next to each other). Necktie the two loose strings together snug with the weave and repeat these steps all the mode across your loom. Repeat this tying with the strings on the bottom as well.
 View in gallery
 3.Once your weave is gratis from the loom, the side by side pace is to tuck in all of the extra strings on the sides. This step is where a needle comes in really handy! To exercise this, simply flip your weave over so you are looking at the back of it and take one of the extra strings and discretely weave it into the back of the weave. Y'all will want to flip the weave dorsum over and make sure you can't see it from the front side. Do this with all of the extra string on the sides.
 View in gallery
 You lot will besides exercise this with the white strings that created your loom (the warp threads) past tucking them straight up and into the lesser of the weave (pictures beneath). Just do this with the strands on the bottom as you will need the strings on the peak to assemble the dowel for hanging!
Hanging your weave:
ane.Now that the extra yarn on the sides and the bottom of your weave are nicely tucked away, you can hang your new weave. Using a wooden dowel that is slightly longer than the length of the weave, place information technology at the meridian of your weave. Take each of the white loom strings and gently tie the wooden dowel in place by tying the white strings around it.
 View in gallery
  View in gallery
 ii.Once each cord is tied around the dowel, you will weave the excess long white strings into the meridian of the loom and so cut off any excess.
 View in gallery
  View in gallery
  View in gallery
 3.Lastly, take a new strand of white yarn and tie it to the wooden dowel on both ends, creating a loop so you lot tin hang your masterpiece! All y'all need now is a thumb tack or a blast to hang it up!
 View in gallery
 We hung ours with tape because our walls were but painted and weren't allowed to put a thumbtack in them!
 View in gallery
  View in gallery
 Now you lot tin decorate your dwelling house or apartment with your own lovely cobweb fine art! It might seem complicated at start, but once y'all get the hang of it it is a lot of fun and you might stop upward with an abundance of wall hangings you don't know what to do with!
Source: https://www.homedit.com/weaving-loom/
Enregistrer un commentaire for "Weaving Loom - Basic Yarn DIY Wall Hanging"